How to Design a Gym Floor Layout That Maximises Space and Member Experience

Click Below To Share & Ask AI to Summarize This Article
Gym Floor Layout Is a Business Decision, Not Just an Aesthetic One
How your gym floor is arranged directly affects member experience, safety, operational efficiency, and how many people can train simultaneously without feeling crowded. A poorly planned layout produces bottlenecks, unsafe equipment proximities, underused corners, and members who feel the gym is always full even when it is not. A well-planned layout maximises the usable capacity of your floor space and creates a logical, intuitive flow that members navigate comfortably.. Cardio equipment generates heat and noise; good ventilation in this zone is critical.
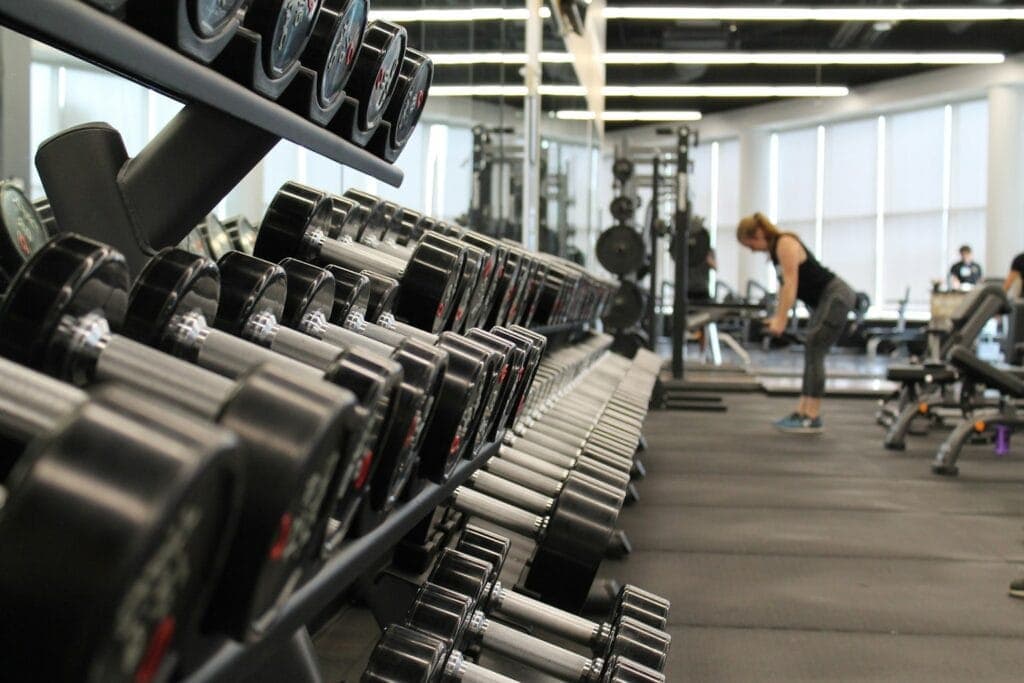
Free weights zone
Dumbbells, barbells, Olympic platforms, benches. This is the highest-risk zone from a safety perspective and should be positioned where it is visible from the reception or staffed area, and where members cannot trip over equipment into a busy pathway. Mirror wall behind dumbbell racks (the standard arrangement) requires adequate floor space in front — minimum 2.5m clearance in front of a mirror wall to allow benching and avoid members colliding with each other. Olympic lifting platforms should be positioned to allow the full range of movement without encroaching on walkways.
Selectorised strength machines
Cable machines, plate-loaded machines, selectorised stack machines. These are typically placed in the centre of the floor or along internal walls, creating a logical circuit flow. Ensure adequate clearance for the range of motion of each machine: a cable fly station needs clear space to each side; a lat pulldown needs clear space directly in front. Group antagonist muscle movements together (pushing/pulling) to create an intuitive training flow.
Functional training zone
Functional rig, kettlebells, medicine balls, battle ropes, resistance bands, TRX. This zone needs significant open floor space and should be clearly demarcated — functional training involves dynamic, multi-directional movement and requires the most clearance of any zone. Position away from fixed equipment that members could collide with during lateral movements. Rubber flooring with good impact absorption is essential here.
Stretching and mobility zone
Mats, foam rollers, mobility tools. Should be positioned away from the high-energy zones — stretching members need space and relative calm. A corner or dedicated alcove works well. This zone is often underinvested by gym owners; members who have a defined, comfortable place to stretch before and after training have a better experience and are less likely to occupy bench space for foam rolling.
Traffic Flow: How Members Move Through Your Gym
The path from the entrance to the changing rooms to the gym floor, and back, should be logical and unobstructed. Common traffic flow mistakes:
- Equipment in natural pathways — placing equipment in the direct line between the entrance and the changing rooms forces members to navigate around it on every visit. Map the natural desire lines (where people would walk if nothing was in the way) and ensure those paths are clear.
- Single-point bottlenecks — if the only way to reach the free weights area requires passing through the cardio zone, congestion compounds at peak hours. Design multiple routes through the space where possible.
- Water fountain and equipment storage placement — water fountains, towel dispensers, and equipment storage create micro-congestion wherever they are placed. Position them in low-traffic corners or against walls, not in the middle of high-use zones.
- Reception sightlines — position your reception desk with clear sightlines to as much of the gym floor as possible. Staff should be able to see the free weights area and at least the entrance to the cardio zone without leaving reception.
Safety Spacing: Regulatory and Practical Requirements
The Health and Safety Executive does not specify precise equipment spacing requirements for commercial gyms, but the Provision and Use of Work Equipment Regulations (PUWER) require that equipment is arranged so that it can be used safely. Industry standards and public liability considerations suggest:
- Minimum 1.5m clearance between any two pieces of moving equipment (treadmill belts, cable machine range of motion, bench press reach)
- Minimum 1m emergency access pathway along every wall of the gym floor
- Emergency exit routes unobstructed at all times — no equipment within 1m of an emergency exit
- Functional training zones with a minimum 3m ceiling height if overhead pressing movements are performed (overhead barbell press, kettlebell swings)
- Olympic platforms set back at least 2m from any wall to allow safe drop of loaded barbells
When in doubt, err toward more space rather than less. Overcrowded gym floors generate safety incidents, member complaints, and public liability exposure — the revenue from one additional piece of equipment rarely justifies the cost of the incidents it enables.
Ventilation and Lighting
Two infrastructure factors that significantly affect member experience and are often poorly considered in gym floor design:
Ventilation
A gym with 50 people exercising vigorously generates substantial heat and CO2. Inadequate ventilation produces stuffy conditions that reduce perceived workout quality and increase member complaints. The standard for commercial fitness facilities is 8–10 air changes per hour in the main exercise area. If your existing HVAC cannot achieve this, supplementary ceiling fans (for air movement) and additional extraction can partially compensate. Assess ventilation before finalising equipment placement — dense equipment arrangements that block airflow create hot spots.
Lighting
Good gym lighting is bright enough to work safely with weights, warm enough not to feel clinical, and even enough to avoid dark corners that feel unsafe or underused. LED lighting panels with a colour temperature of 4000K (neutral white) are the standard for gym floors. Avoid overhead fixtures directly above Olympic platforms (creates glare when looking up during a lift). Free weight areas benefit from slightly brighter lighting than stretching zones.
Planning an Equipment Refresh Without Closing the Gym
When refreshing or expanding equipment, complete closure is rarely necessary or desirable. A phased approach:
- Map the new layout on paper first — identify what moves where before any physical changes.
- Communicate with members before work starts: what is changing, when, and why. Members who understand that temporary disruption is part of an improvement programme tolerate it; those who discover it without warning complain.
- Work in zones — complete one zone at a time so the rest of the floor remains operational. Cardio zone, then strength machines, then free weights, or whichever order your layout requires.
- Schedule heavy work (equipment delivery, flooring installation) during off-peak hours or on designated low-traffic days (Monday midday, for example). Some members will need to skip a session; this is acceptable if communicated in advance.
- After completion, do a formal safety walkthrough before reopening any refreshed zone — check equipment placement against your spacing standards, confirm emergency exit access is clear, and verify all equipment is correctly assembled and secure.
Professional Design Support: When It’s Worth It
Most commercial gym equipment suppliers offer free or low-cost 2D and 3D layout planning services as part of a procurement package. These are a useful starting point for a major fit-out or significant equipment refresh. The limitations: supplier-provided layouts tend to maximise equipment density (because their revenue comes from equipment sold) rather than member experience or operational flow.
Independent commercial gym design consultants (several operate in the UK fitness sector) offer more balanced advice. Typical fees: £500–2,000 for a layout review and recommendations on a single-site independent gym. Worth engaging for a new gym fit-out or a significant refurbishment — the cost is small relative to the lease and equipment investment, and a good layout compound its value over the entire facility life.
Your Layout Reflects the Quality of Your Gym
Members notice when a gym floor is thoughtfully arranged — there is a feeling of ease and flow that well-designed spaces produce. They also notice when it is not: the constant minor frustrations of inadequate spacing, poor traffic flow, or zones that conflict with each other accumulate into dissatisfaction that drives churn.
GymPal puts your gym in front of UK gym-seekers who are ready to choose. Claim your free GymPal listing and make sure the gym they find is the well-run, well-designed facility you’ve built.

I am Adam Hall, a dedicated fitness professional with over ten years of experience in the UK’s fitness industry. I earned my Master’s degree in Sports Science from Loughborough University and have worked with several top fitness studios across the UK. My certifications include a Level 3 Personal Trainer Certificate and a specialised Strength and Conditioning Coach accreditation.
Starting my career as a personal trainer, I quickly moved up to manage multiple gym locations, overseeing their operations and training programs. Beyond managing gyms, I regularly contribute to well-known fitness magazines and have been featured in articles for “Health & Fitness” and “Men’s Health”. My passion also extends online where I run a popular blog on GymPal’s AI-powered directory platform detailing insights into choosing the right fitness venues across the UK. With hundreds of posts reaching thousands of readers monthly, my goal is to influence positive changes in how people approach health and exercise throughout the country.